
With the dawn of a new semester, I've been taking the time to get organized in order to get off to the best start possible. This includes putting important dates from syllabi in my planner, writing important events on my wall calendar, and buying new notebooks, binders and folders.
Besides using a planner and a monthly wall calendar, I also use a weekly calendar that I pin on the bulletin board behind my desk. I use it to help me plan out my days and keep me on track for what needs to be accomplished. Last semester, I had just been making my own each week, using a ruler to draw a grid onto a piece of printer paper. It was functional, but definitely not very cute!
Over winter break, I got creative and decided to make a more colorful, preppier version using Microsoft Word.

Want to learn how to make your own monogrammed weekly calendar?
Here's some instructions with pictures!
(I wrote these instructions so that even someone who is not familiar with Microsoft Word can make the calendar, so bear with me if you feel like I am over-explaining things!)
*These instructions are written using Microsoft Windows
*These instructions are written using Microsoft Windows
1. Open a new document in Microsoft Word. Once opened, go to the page layout tab > orientation > and choose landscape. This will turn the paper sideways.


2. Click on the table tab > insert table
3. Once the insert table window opens, change the column number to 4, and the row number to 4 as well. Then hit "ok."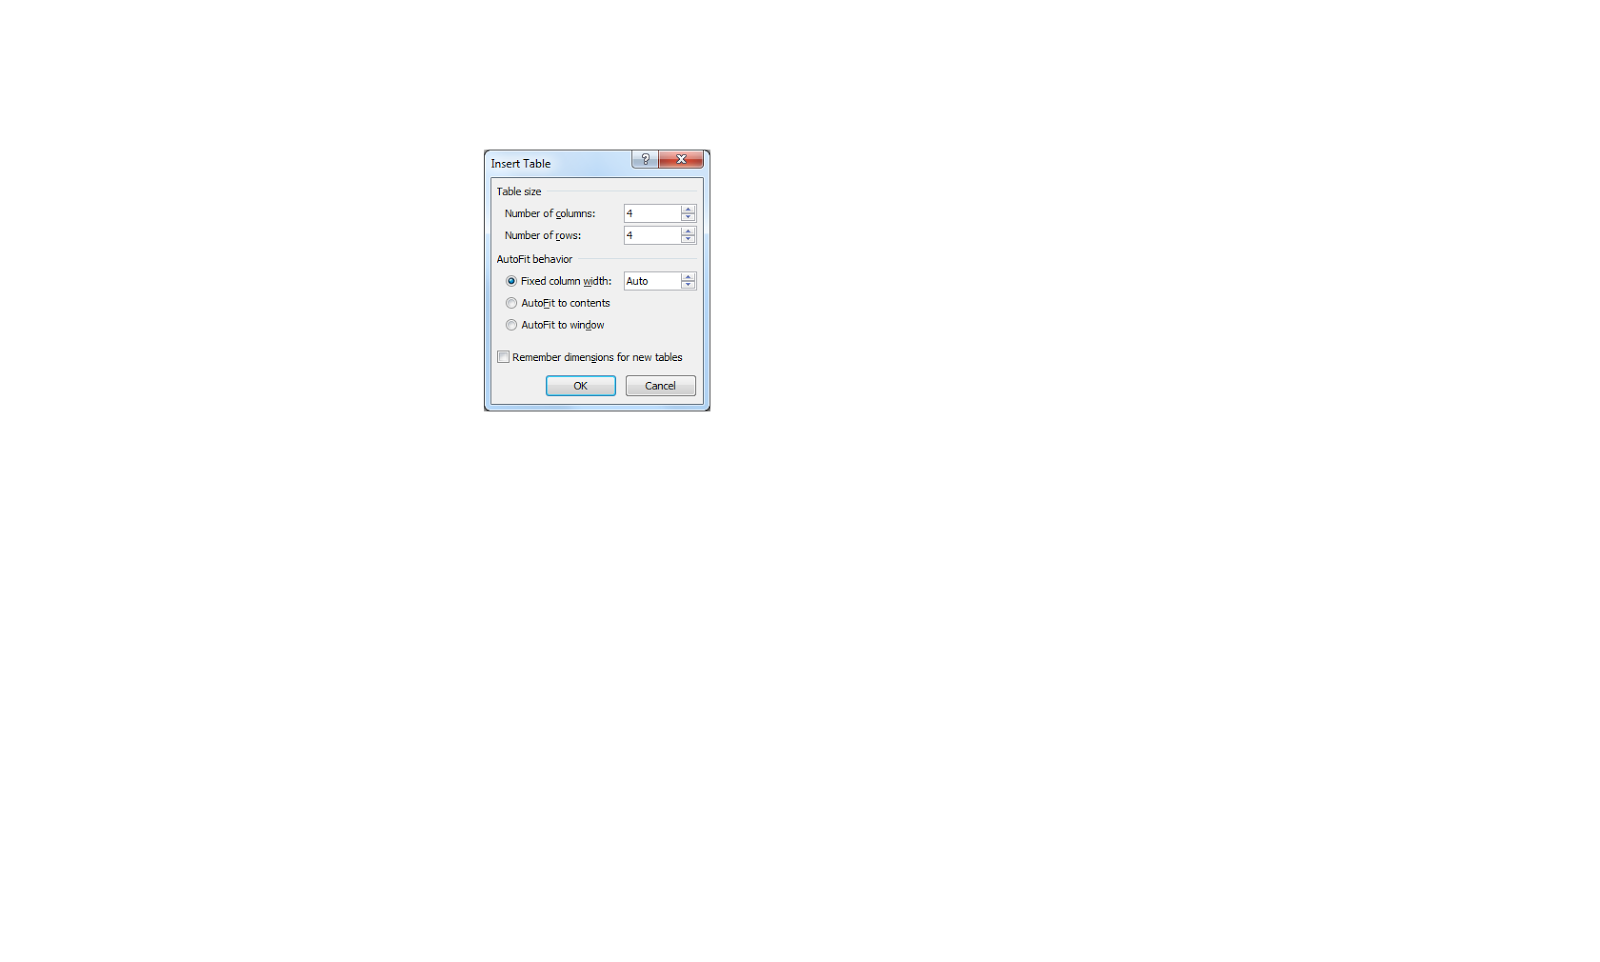
4. The table you inserted should look like this:
5. Hover your mouse along the bottom line of the table. A cursor with an arrow pointing up and an arrow pointing down should appear. Click and drag the line so that it reaches to the edge of the page.
6. Perform the same steps above with the other lines so your table looks like this
7. Put your cursor in the top left table box. Go the the font menu and select a desired font. I chose "Elephant."
8. Type the names of each of the days of the week in the upper skinny boxes.
9. Highlight the table (or individual days of the week) and hit the "center button" in the upper toolbar in order to center your text.
10. The table should look like this:
11. Highlight the table and go to the font menu. Choose a desired color using either the standard or custom color tab. Hit ok.
12. The table should now look like this (with your desired text color.)
13. Right click anywhere in the table to bring up the table menu. Click on "borders and shading."
14. A new window will pop up after performing the previous step. Make sure you have selected the "borders tab" within the table. Go to the width menu and select a desired line thickness. This will change the appearance of the lines in your table.
15. While the same window is still open, go to the color menu. Select a desired color. This will be the color that the lines of your table will be. I chose Navy. Hit okay.
16. Your table should look like this now:
17. Go to the following website: http://forchicsake.com/printable-monogram/. Select a desired monogram color, and follow the instructions to create your monogram. Your monogram should look something like this:
18. While still in Adobe Reader, highlight the monogram and hit copy. Then open up "paint" and paste the monogram into the program. Use the cut function to trim the excess border around your monogram. Save the monogram as a photo file.
19. Go back to the Microsoft Word window where your table is. Insert your cursor into the bottom right hand box. Go to the insert tab > picture > picture from file. Select your monogram.
20. Your monogram will appear in the box. It might not be centered. If so, right click on the monogram select text wrapping > square. This will let you move the monogram around and adjust the size.
Voila!
A finished calendar to keep you organized!
You can print your calendar on several sheets of computer paper and use a new sheet every week, or print it on photo paper and the glossy surface turns it into a dry erase board calendar.
What do you think? Will you try this tutorial? Let me know! If you do, I want to see pictures! Tweet me @erussell495
Stay Stylish. Stay Classy. Be Creative.
Emily
What a fabulous idea! I can't wait to make a few to keep in each one of my class folders. There's nothing better than having a quick place to jot down the day's to-do list! Thanks for the tips :)
ReplyDelete